Purge Uninstaller handbook
How to use Purge Uninstaller: uninstalling an app and everything it leaves, putting things back, and your license.
Sections
Getting started
Uninstalling
Pro and your license
Install
Download Purge Uninstaller from the Download page and open the setup file. It installs for your Windows account only, so it needs no administrator rights. Start it from the last page of the setup or from the Start menu.
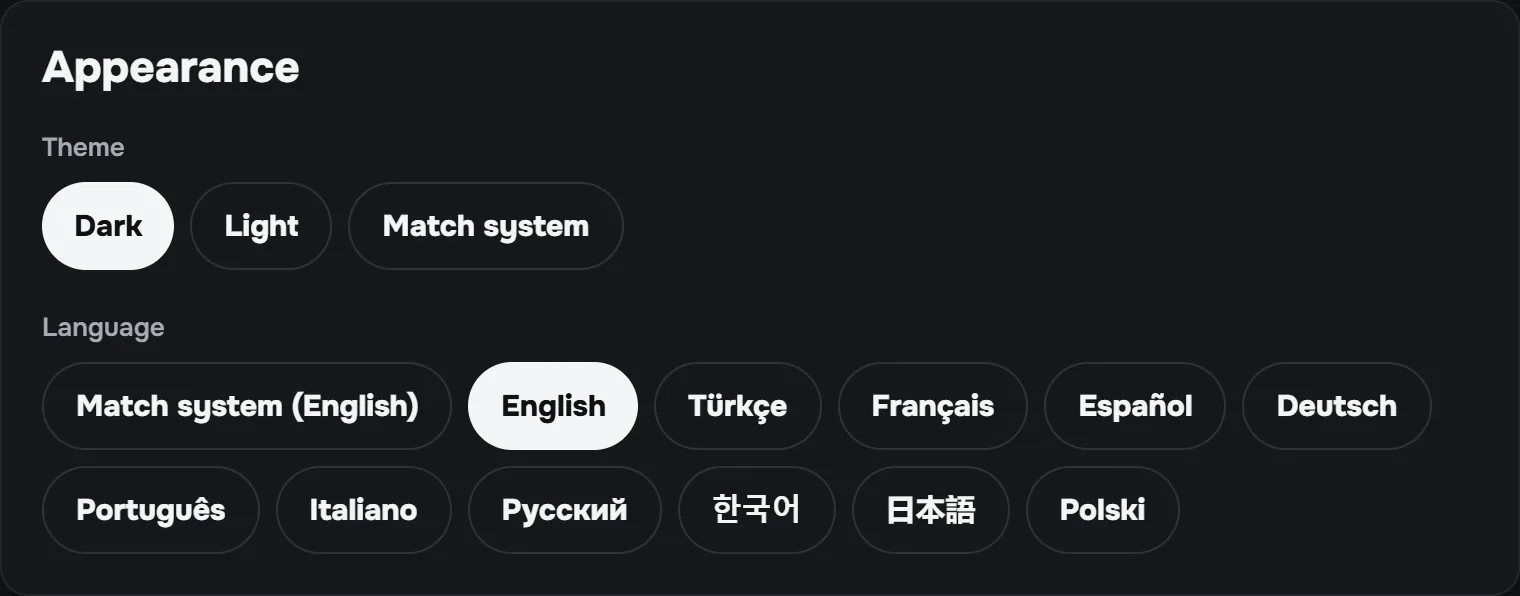
It runs on Windows 10 and Windows 11, 64-bit, and opens in your Windows language when it has it: English, Türkçe, Français, Español, Deutsch, Português, Italiano, Русский, 한국어, 日本語 or Polski. You can change the language in Settings.
On a Mac, open the disk image and drag Purge Uninstaller to Applications. It asks for nothing at first launch; on macOS 13 and later it offers the Trash watcher once. When the leftovers include an app’s container, it asks for Full Disk Access right then.
The app list
The Apps screen lists what is installed: desktop programs, Windows Installer (MSI) packages and Microsoft Store apps, each with its size, publisher and install date. Sort by name, size or install date, or type in the search box to find one.
Pick an app to see it on the right: its version, where it is installed and for whom, and the leftovers Purge Uninstaller expects it to leave. Nothing is removed until you choose to remove it.
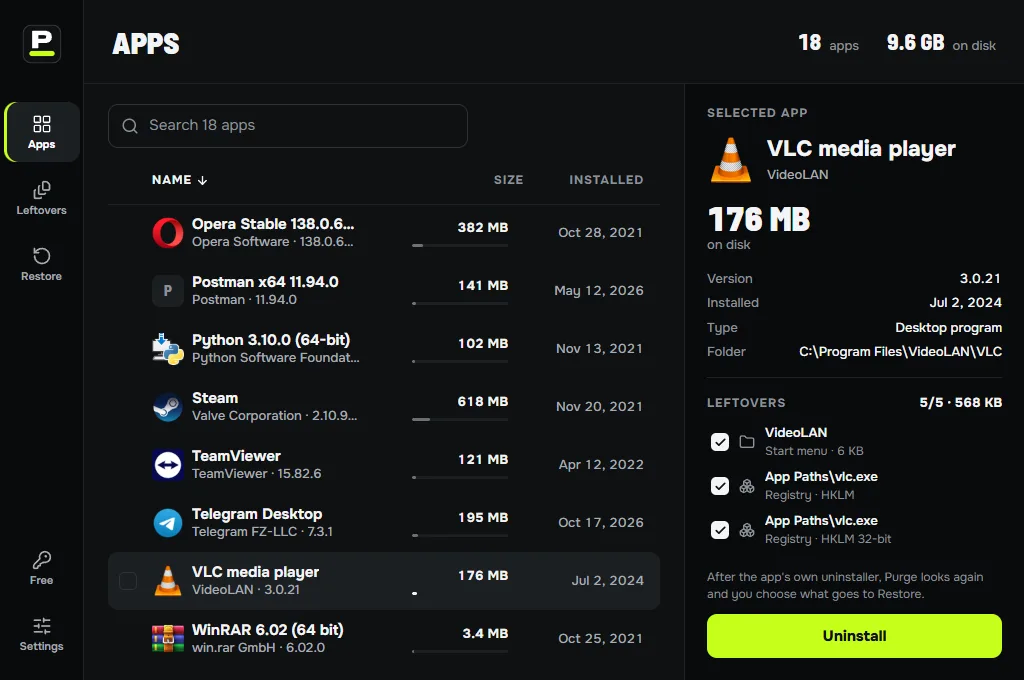
Uninstall an app
- Pick the app and choose Uninstall.
- The app’s own uninstaller runs. If it opens a window, finish it there: Purge Uninstaller waits.
- When it closes, Purge Uninstaller looks again and lists what the app left behind.
- Check the list and choose Remove. The leftovers move to Restore; nothing is deleted outright.
Removing an app installed for everyone on the computer needs administrator rights, so Windows asks you first. Choose Yes. If you choose No, nothing changes.
If the app is gone but its uninstaller’s window stays open, Purge Uninstaller says so and offers Continue.
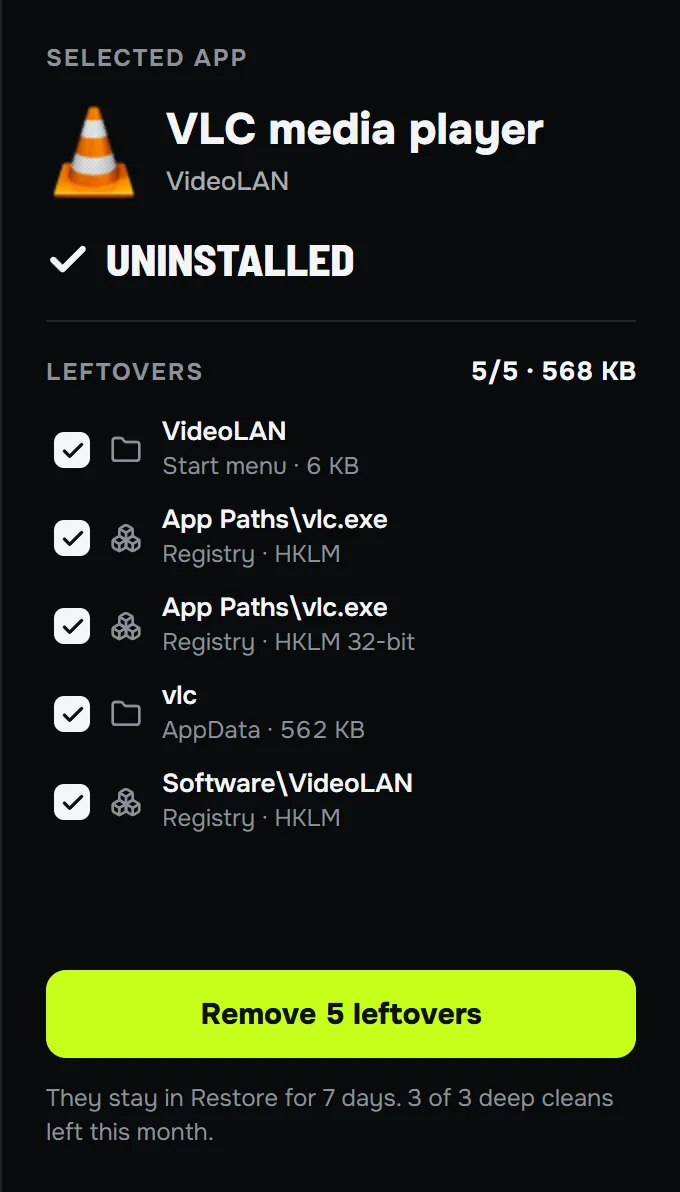
What counts as a leftover
Purge Uninstaller looks where apps keep their files and settings: the Program Files, ProgramData and AppData folders, Start menu and desktop shortcuts, the app’s registry keys, startup entries, services, link handlers and the Windows 11 right-click menu.
Each match comes with its reason. Clear matches, such as the folder the app was installed to or a shortcut that opens its program, are ticked for you. A match marked Possible, such as a folder in your Documents that is only named like the app, is listed unticked: it may hold your own files, so look at it before you remove it.
It never touches Windows itself, the files of another installed app, folders that several apps share or your cloud folders (OneDrive, Dropbox, Google Drive, iCloud Drive and Box).
A missing or broken uninstaller
Some apps lose their uninstaller, or it fails. Then Purge Uninstaller offers Force uninstall: it skips the uninstaller and also removes the app’s folder and its entry in Windows’ list of installed apps. All of it goes to Restore first.
Force uninstall is for desktop programs. Windows Installer packages and Microsoft Store apps can only be removed by Windows itself.
Several apps at once
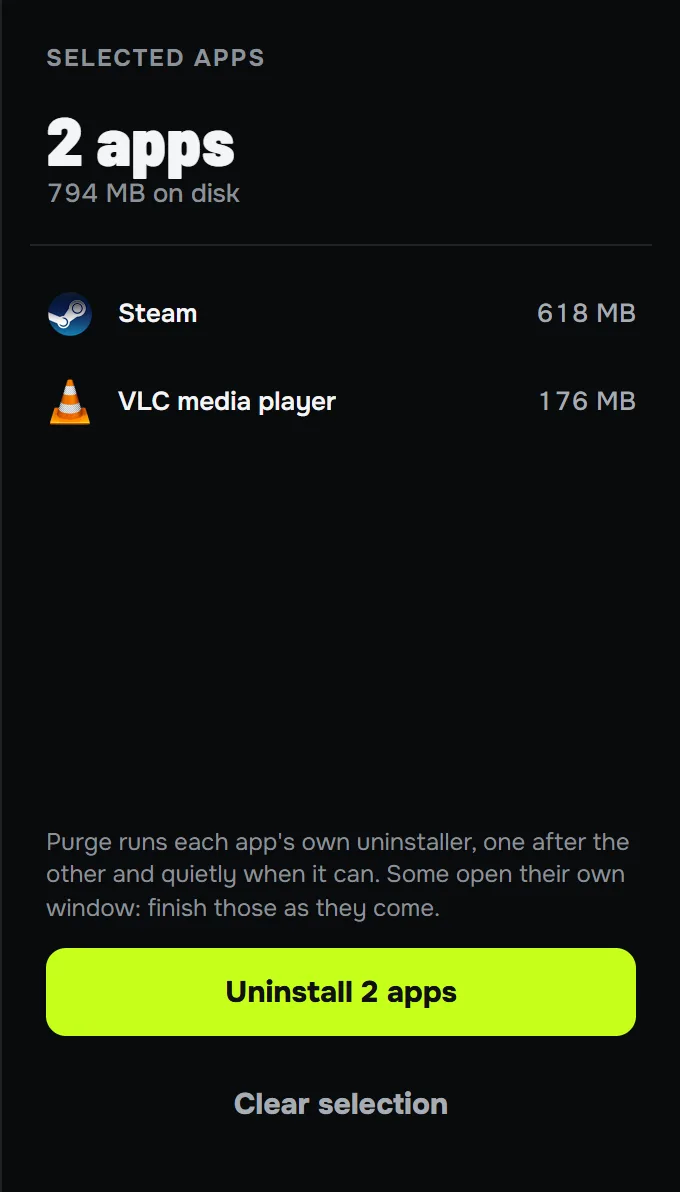
Tick the box next to each app (it shows when you point at a row, or press Space) and choose Uninstall on the right. Purge Uninstaller runs their uninstallers one after the other, quietly when an uninstaller allows it. Some open their own window: finish those as they come.
Then the leftovers of all of them are listed together, to remove in one go. Free takes 2 apps at a time; Pro takes any number.
From the right-click menu
Right-click a program or its shortcut and choose Uninstall with Purge. On Windows 11 it is under Show more options. Purge Uninstaller opens on that app, so you see what it leaves before anything goes.
A portable program runs without being installed: it has no uninstaller and no entry, and Purge Uninstaller tells you so.
Apps that are already gone
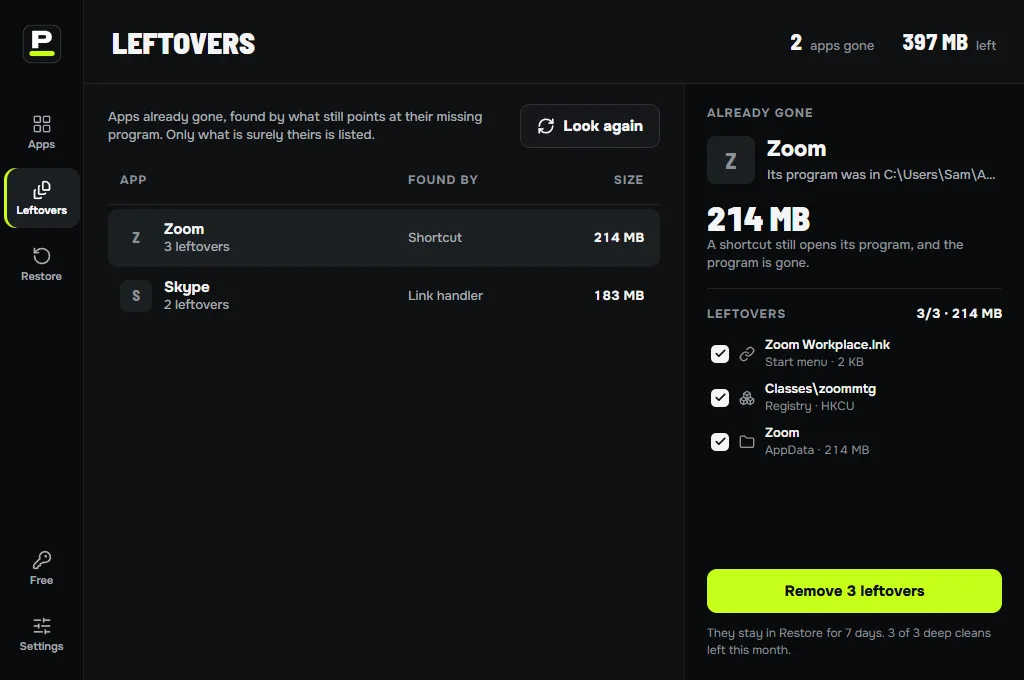
The Leftovers screen finds what earlier uninstalls left behind, including ones done without Purge Uninstaller: a shortcut, a startup entry or a link handler that still points to a program that is gone.
Only what is surely the missing app’s is listed. Pick one, check what it left and choose Remove; it goes to Restore like any other clean.
Restore
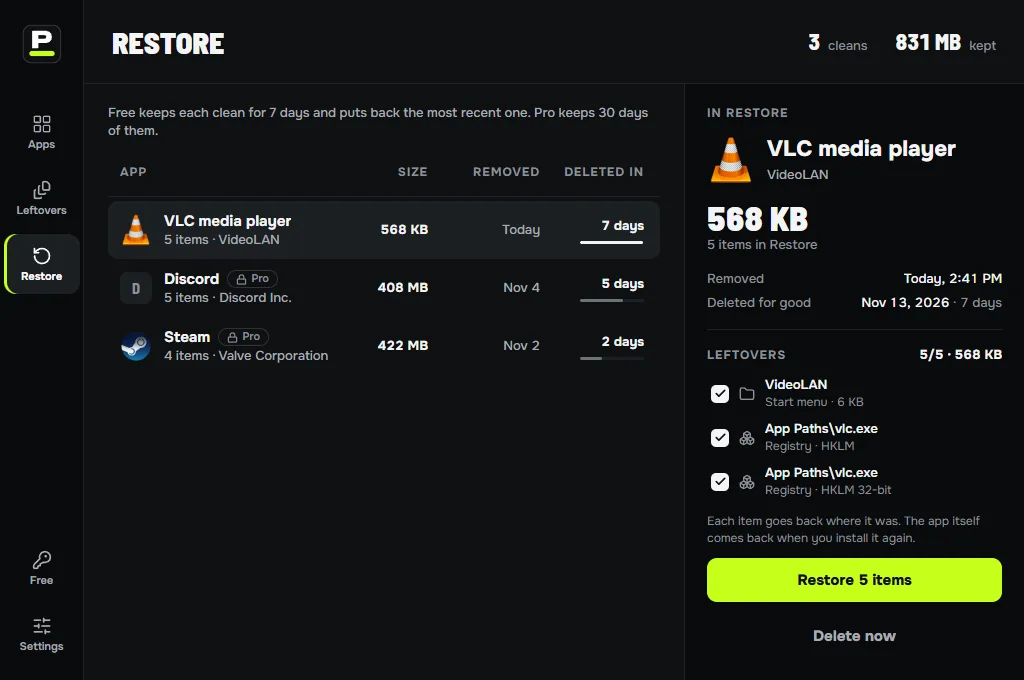
Everything Purge Uninstaller removes goes to Restore first. Pick a clean, choose its items and select Restore: each goes back where it was. After a Force uninstall the app’s folder and entry come back too; otherwise the app itself comes back when you install it again.
Pro keeps every clean for 30 days. Free keeps each for 7 days and puts back the most recent one. After that a clean is deleted for good; Delete now does it sooner, to free the space.
A Windows package, such as a right-click menu an uninstaller left, is removed for good instead: Windows keeps no copy to put back. Purge Uninstaller says so before you remove it.
Free and Pro
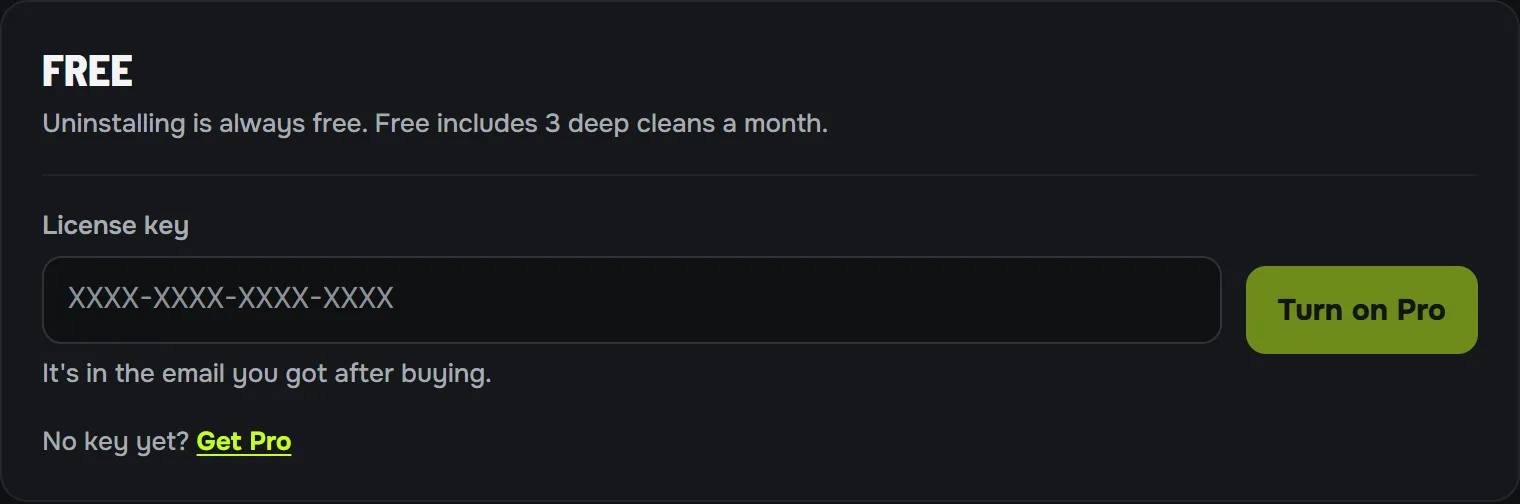
Uninstalling is always free, with no limit. Free also includes 3 deep cleans a month: removing an app’s leftovers uses one. An app counts once a month, so putting its leftovers back and removing them again costs nothing.
Pro removes leftovers without a limit, takes any number of apps in one batch and keeps 30 days of cleans in Restore. It is one payment, for one computer at a time, Windows or Mac. Within 14 days of buying, write to us for a full refund.
Turn on Pro
- After you buy, open the email with your license key and choose its button: Purge Uninstaller opens and turns Pro on.
- Or choose Free at the bottom of the left bar, paste the key and choose Turn on Pro.
To move Pro to another computer, choose Pro in the left bar, then Move Pro to another computer and Turn off Pro here. Then enter the same key on the other computer. You can also release it from your account on this site.
Purge Uninstaller checks the license once a day. If it was refunded or moved to another computer, Pro turns off and the license page says why.
Settings and updates
Choose a dark or light look, or follow Windows. Choose the language, or Match system to follow your Windows language.
With automatic updates on, Purge Uninstaller looks once a day and downloads a new version in the background. When one is ready, a dot appears on Settings: restart from there. It never restarts in the middle of an uninstall or a restore.
What Purge Uninstaller sends
While Pro is on, it sends the license key and an anonymous code for the computer once a day, to check that the license is still on this computer. To look for updates, it sends the version you have.
It also sends anonymous usage counts to PostHog in the EU, such as how many leftovers an uninstall found. They never include the names of your apps, files or folders, any path or your license key. The privacy policy lists all of it.
When something goes wrong
Some files stayed: a program had them open. Close it and choose Try again.
The administrator prompt was declined: nothing changed. Choose Uninstall again, then Yes.
Anything else: choose Copy details under the message and paste it into an email to support@purgeuninstaller.com. It is a report of what Purge Uninstaller did for that app, and it leaves your computer only if you send it.